....reduced in numbers by about a box and lid full. [Sorry for the delay, but I had another "project" come up that trumped this one which I'll post about later this week after. It wasn't all fun and I'll spare you the pictures of that part.
 These, plus the lid for this full, already in my car because I could lift them, are getting donated.
Anyway, what started out as a New Years Resolution is finally finished. This book case was just crammed full of my books (though mostly organized) and then when the hubs moved in I just wanted to be unpacked and boxless. So, I simply crammed all of his books on the shelves where ever and how ever they fit and they've been that way ever since. Two. Years. Later.
Here's what we started with before the above books were removed.


I guess this project was somewhat delayed since I only told him that "I want to clean the bookcases so let's set the goal of trying to get rid of 10 books each. You need to go through your books." WEEKS later. No movement. Finally, I really wanted to tackle this so I figured a man needs a little more guidance. I made a pile of my books I was removing. Then I made piles of books based on genre: Fiction, Classics, Hobbies, Self Improvement, Home/Garden related, Educational, Miscellaneous. I included his books that I knew he would not part with.
Then, a very crucial step if this process were to continue at this speed, I piled all of his remaining books in a pile on the floor that he had to go through. This took a seemingly daunting task for a male and made it more manageable by putting everything he needed to look at in one place and not dispersed all over the book shelves. Victory! [Short-lived victory, it appears I didn't take any 'during' shots of all of those piles on the floor. Boo.]
So with that done, I then just put them all back on the shelves in their genres trying to keep the sizes and colors together.
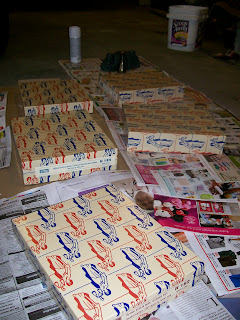
Next, I went for a more cohesive look to some of the accessories on the shelves so I took a few things out to the garage and started the Never Ending Spray Paint Project. The book shelf organizing and book ridding was also supposed to leave room to add some organized boxes of art/craft supplies. We got these leather bound minute books at work which came in these fantastic sturdy boxes, which I kept. At Last! I had a use for them. I'd spay paint those white along with bookends and an ugly little brass vase. I viewed this as a great chance to try out the spray primer I knew was in the garage. After about 12 seconds, it stopped spraying. It was super old (like the home's previous owner's), so I wasn't surprised. I knew I would have to get primer at the store so I bought the Rustoleum primer and grabbed another can of glossy white. Lowes didn't have it in Rustoleum so I went with Valspar. The primer went on in one coat over all that stuff, but here it is a week into layer after layer of white and I think I'm finally finished. [Hence the never ending part and my preference for Rustoleum now.]


With the spray painting finally finished I was able to bring in all of my boxes and accessories and put them on the shelves. I realigned things as I went to try for a more balanced look. However, these are bookshelves and we do have books so I knew some of the shelves would be completely full of books. Those shelves I tried to keep lower than eye level and then use books, pictures and decor on the shelves that were more conspicuous. Can you find the items from the garage? (I started trying to get my artsy shots on and ended up with a lot of pics!)


Here are some side by side comparisons of same shelves (but not exact same shot since pics were spread out on a couple different cards and the camera memory itself) to make it easier to figure out the changes.


BEFORE AND AFTER


BEFORE and AFTER


BEFORE and AFTER
If you have suggestions for making them more cohesive I'd love to hear what you think. As long as it does not involve getting rid of more books!


 Has anyone seen anything like on the storage file below that was sold in a pack that you could glue or somehow attach to your own boxes. Or does anyone have suggestions for something I could DIY for labeling the ends of my boxes. I am getting a little tired of pulling down and opening several until I find what I'm looking for.


